
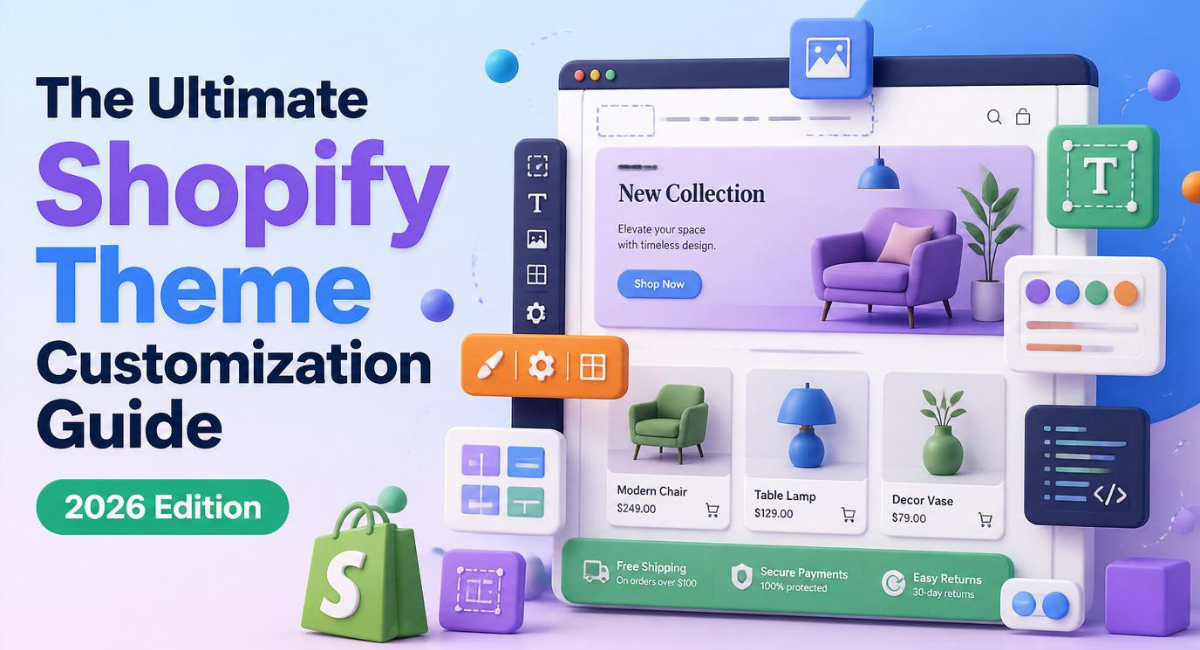
The Ultimate Shopify Theme Customization Guide for 2026
I remember the very first time I opened a website editor.
I was staring at a blank, boring template, completely unsure of what to click next.
My products were great, but my website looked like it was built in 1999.
I quickly realized that customers judge your brand’s credibility within the first three seconds of landing on your page.
If your website looks cheap, people will assume your products are cheap.
That is why mastering Shopify theme customization is one of the most profitable skills you can learn as an ecommerce entrepreneur.
In this comprehensive guide, I am going to show you exactly how to transform a basic, free template into a premium digital storefront.
We will cover everything from setting up your global brand colors to structuring a high-converting product page.
Let’s dive in and make your store look incredible.
Quick Answer
What is Shopify theme customization?
Shopify theme customization is the process of modifying your online store’s visual design and layout using the built-in drag-and-drop editor. It involves changing colors, updating typography, arranging homepage sections, and organizing product pages to create a unique brand identity. You do not need to know HTML or CSS to customize a modern theme effectively.
Table of Contents
-
What is Shopify Theme Customization?
-
Why Shopify Is a Good Choice for Beginners
-
Step-by-Step Process: Shopify Theme Customization
-
Quick Comparison Table: Free vs. Premium Themes
-
Cost Breakdown Table: Theme Customization
-
Pros and Cons of DIY Design
-
Essential Tools Required for Customization
-
Common Mistakes in Theme Customization
-
Best Practices for High Conversions
-
Expert Tips for Premium Aesthetics
-
Future Trends in Web Design
-
Beginner Checklist for Theme Launch
-
Recommended Internal Links
-
Frequently Asked Questions
-
Related Topics Readers Should Learn Next
-
Final Verdict
What is Shopify Theme Customization?
At its core, theme customization is how you tell your brand’s visual story.
When you first open a new store, the platform gives you a default, blank-slate template.
While it functions perfectly, it lacks the personality required to stand out in today’s crowded market.
Customization allows you to inject your brand’s soul into the digital architecture.
It is how you arrange your hero banners, place your customer reviews, and highlight your core value propositions.
Thanks to the modern “Online Store 2.0” architecture, you can now add dynamic sections to almost any page on your website, giving you ultimate creative control.
Why Shopify Is a Good Choice for Beginners
Before we dive into the design steps, we need to talk about the platform itself.
Many beginners get paralyzed thinking they need to hire an expensive web developer to build a decent site.
This is entirely false.
The visual editor provided by this platform is arguably the most intuitive drag-and-drop system in the ecommerce industry.
You can literally build a multi-million dollar storefront using just your mouse.
It handles all the complex backend coding, mobile responsiveness, and image formatting automatically.
If you have not started yet, click here to grab your Shopify free trial so you can follow along with this tutorial in real-time.
Having the right software foundation makes the entire design process effortless and actually fun.
Step-by-Step Process: Shopify Theme Customization
This is the core execution phase.
Do not skip around. Follow these steps in chronological order to build a cohesive, beautiful website.
Step 1: Choose Your Base Theme
Your theme dictates the underlying skeleton of your website.
Go to Online Store > Themes.
If you are just starting, do not spend money on a premium theme right away.
The free “Dawn” theme is incredibly fast, highly customizable, and optimized for mobile devices.
If you want to explore other aesthetics, click “Visit Theme Store” and browse the free options.
Once you find one you like, click “Add to theme library.”
Step 2: Access the Visual Editor
Once your theme is installed, click the large green Customize button.
This opens the main editing dashboard.
You will see a live preview of your website in the center of the screen.
On the left side, you will see a list of “Sections” and “Blocks” that make up the current page.
On the right side, you will see the settings menu for whichever block you are currently clicking on.
Step 3: Configure Global Theme Settings
Before you start adding pictures, you must set your brand rules.
Click the Gear Icon (Theme Settings) on the far left menu.
This is where you define your brand’s identity across the entire website.
Colors:
Choose your primary accent color, background color, and text colors.
For example, if you are building a luxury brand like WOW CULTURE selling high-end 3D miniature statues, you might choose a sophisticated palette with dark charcoal backgrounds, gold accents, and stark white text.
Typography:
Select your fonts.
Choose a bold, clean font for your headings and a highly readable, simple font for your body text.
Logo:
Upload your transparent PNG logo. Adjust the slider so it is visible but not taking up half the screen on mobile devices.
Step 4: Design the Homepage Layout
Your homepage is your digital storefront window.
Go back to the Sections icon on the left menu.
The Hero Banner:
Add an “Image with Text” or “Image Banner” section at the very top.
Upload a stunning, high-resolution photo of your product.
Add a bold headline and a clear “Shop Now” button.
Featured Collection:
Right below the banner, add a “Featured Collection” section.
This immediately shows visitors what you are actually selling without forcing them to click a menu.
Social Proof:
Add a “Rich Text” or “Multicolumn” section.
Use this area to highlight your unique selling points, such as “Free Shipping Nationwide,” “Secure Payments,” or a brief customer testimonial.
Step 5: Optimize the Product Page Layout
Your product page is where the actual sale happens.
Use the dropdown menu at the top center of the editor to navigate from the “Home page” to “Products > Default product.”
This template dictates how every single item in your store looks.
Let’s say you are selling digital products, like real estate Canva template bundles priced at ₹499.
Your product page needs specific trust signals to convert.
-
Move the Description: Ensure your product description block is directly below the price, not hidden at the bottom of the page.
-
Add Trust Badges: Add an image block featuring secure checkout icons.
-
Highlight Delivery: Add an icon-with-text block explicitly stating “Instant Digital Delivery via Email.”
By customizing this template once, it automatically applies to every Canva bundle you upload to your store.
Step 6: Customize the Header and Footer
Do not neglect the very top and very bottom of your website.
The Header:
Keep your main menu incredibly simple.
Include links to “Shop All,” “Best Sellers,” “About Us,” and “Contact.”
Turn on the “Sticky Header” option so the menu follows the customer as they scroll down the page.
The Footer:
Your footer is the anchor of your site.
Add a newsletter signup form here to capture emails.
Create a “Quick Links” menu pointing to your Refund Policy, Shipping Policy, Privacy Policy, and Terms of Service.
This is critical for establishing legal trustworthiness.
Step 7: Mobile Optimization Check
This is the most important step in the entire Shopify theme customization process.
Look at the very top right corner of your editor and click the Mobile icon.
This switches your preview to a smartphone screen.
Over 70% of your customers will view your site this way.
Does the text look too big? Are the images cut off? Is the “Add to Cart” button easy to tap with a thumb?
Adjust your padding and font sizes specifically for mobile devices before you ever hit publish.
Quick Comparison Table: Free vs. Premium Themes
Should you upgrade your theme? Here is a simple breakdown.
| Feature | Free Themes (e.g., Dawn) | Premium Themes |
| Price | $0 | $150 to $350+ |
| Customization Depth | Excellent for beginners | Deeply advanced |
| Built-in Features | Basic features | Includes built-in pop-ups, upsells, and countdown timers |
| Site Speed | Incredibly fast (lightweight code) | Can be slightly slower if overloaded with features |
| Best For | New stores testing products | Established brands scaling revenue |
Cost Breakdown Table: Customizing Your Store
What does it actually cost to design a professional site?
| Expense Category | DIY Customization | Hiring an Agency/Developer |
| Base Theme | $0 (Free) | $250 – $350 (Premium Theme usually required) |
| Graphic Design (Canva) | $15 / month | $500+ (Custom branding assets) |
| Development Labor | $0 (Your time) | $1,000 to $5,000+ |
| Custom Coding Fixes | $0 | $50 to $150 / hour |
| Total Estimated Cost | $15 | $1,750 – $5,500+ |
If you are just starting out, there is zero reason to hire an agency. Use this link to start your Shopify trial and build it yourself using the visual editor. It will save you thousands of dollars.
Pros and Cons of DIY Design vs. Hiring a Developer
DIY Customization Pros and Cons
| Pros | Cons |
| Saves thousands of dollars in startup capital. | Takes time to learn the visual editor interface. |
| You understand your website and can fix it instantly. | You are limited by your own graphic design skills. |
| No waiting weeks for a developer to answer emails. | Advanced custom features might require coding knowledge. |
Essential Tools Required for Customization
To make your website look like a million-dollar brand, you need a few tools outside of the platform itself.
1. Canva Pro
You need this for designing your hero banners, compressing your logo, and formatting your product images. The background remover tool alone is worth the subscription price.
2. Image Optimizer App
Heavy images will destroy your loading speed. Use an app from the App Store to automatically compress your JPEG and PNG files as you upload them.
3. Color Palette Generator
Do not guess which colors look good together. Use a free tool like Coolors to generate a mathematically perfect, complementary color palette for your brand settings.
Common Mistakes in Shopify Theme Customization
Avoid these rookie errors that instantly make a store look amateurish.
1. Using Too Many Colors
Your website should not look like a rainbow. Stick to a strict rule: One primary background color (usually white or off-white), one dark text color, and exactly ONE vibrant accent color for your “Buy” buttons.
2. Ignoring Image Ratios
If one product photo is a tall rectangle and the next is a perfect square, your collection page will look chaotic and broken. Crop all your main product images to the exact same aspect ratio (1:1 square is the safest bet) before uploading them.
3. Writing Giant Paragraphs
People do not read on the internet; they scan. If your homepage has a solid block of text spanning ten lines, nobody will read it. Keep paragraphs to a maximum of two or three short sentences.
Best Practices for High Conversions
Beautiful design is pointless if it doesn’t generate sales.
Make the “Add to Cart” Button Pop
Your primary call-to-action button should be the brightest thing on the page. If your brand colors are black and white, make your checkout buttons a bold, high-contrast color like emerald green or deep gold.
Keep the Above-the-Fold Clean
“Above the fold” refers to what a customer sees before they scroll down. When someone lands on your product page, they should instantly see the product title, the price, the reviews, and the Add to Cart button without moving their thumb.
Use Lifestyle Imagery
If you sell physical products, do not just use white-background photos. Show the product being used by a real human in a real-world setting. This helps the customer visualize owning the item.
Expert Tips to Elevate Your Brand Aesthetics
If you want to achieve a premium, luxury look for your brand, focus on these advanced tips.
1. Leverage Negative Space
Luxury brands use massive amounts of white space (empty space). Do not cram your images and text tightly together. Go to your theme settings and increase the padding between your homepage sections to let the design “breathe.”
2. Use Cinematic Lighting in Product Shots
The secret to high-end ecommerce is sharp photography. Whether you are selling tech gadgets or bespoke miniatures, use professional lighting techniques to create crisp contrast and soft shadows. High-quality imagery instantly elevates the perceived value of any theme.
3. Stick to Sans-Serif Fonts
Unless your brand has a highly specific vintage or editorial aesthetic, stick to clean, modern sans-serif fonts (like Inter, Roboto, or Helvetica) for your main website text. They render perfectly on small mobile screens.
Future Trends in E-commerce Web Design
Web design evolves rapidly. Staying ahead of these trends will keep your store looking modern.
According to data from HubSpot, the biggest shift right now is toward hyper-personalization. Modern themes are incorporating dynamic blocks that change based on the user’s location or past browsing history.
We are also seeing a massive rise in “Dark Mode” capabilities. Many premium templates now offer a toggle switch that allows users to view your site in a dark, sleek colorway, which reduces eye strain and looks highly futuristic.
Finally, 3D product rendering is becoming mainstream. Instead of static images, themes are evolving to support interactive 3D models directly on the product page, allowing customers to spin and zoom in on items before buying.
Beginner Checklist for Theme Customization
Before you announce your new site design to the world, run through this final checklist.
-
All brand colors are set consistently in the Theme Settings.
-
The logo is transparent and clearly visible on both desktop and mobile.
-
Homepage hero banner has a clear headline and a working button.
-
Product pages feature high-quality images with identical aspect ratios.
-
The “Add to Cart” buttons stand out with a contrasting color.
-
The main menu navigation is simple and easy to understand.
-
Legal policies are clearly linked in the footer menu.
-
The mobile view has been thoroughly tested and adjusted.
-
Unused theme sections and filler text (Lorem Ipsum) have been deleted.
-
The checkout page logo and colors match the main website.
Recommended Internal Links
- How to start a Shopify store in 2026
https://theecomfuture.com/the-ultimate-guide-on-how-to-start-a-shopify-store-in-2026/ - Shopify vs WooCommerce for beginners
https://theecomfuture.com/shopify-vs-woocommerce-which-is-better-for-beginners-in-2026/ - Shopify vs Wix comparison
https://theecomfuture.com/shopify-vs-wix-the-honest-truth-on-which-is-best-in-2026/ - Starting a clothing brand with Shopify
https://theecomfuture.com/how-to-start-a-clothing-brand-using-shopify-a-beginners-step-by-step-guide/ - Print-on-demand business with Shopify
https://theecomfuture.com/how-to-start-a-print-on-demand-business-with-shopify-a-beginners-step-by-step-guide/ - Baby products business online
https://theecomfuture.com/how-to-start-a-baby-products-business-online-complete-beginners-guide-for-2026/ - Dropshipping with AI tools
https://theecomfuture.com/how-to-start-dropshipping-with-ai-tools-in-2026-a-beginners-step-by-step-guide/ - Subscription box business guide
https://theecomfuture.com/how-to-start-a-subscription-box-business-in-2026-complete-beginners-guide/ - Launch your first Shopify business
https://theecomfuture.com/the-ultimate-guide-on-how-to-start-a-shopify-store-in-2026/ - Shopify store setup guide
https://theecomfuture.com/the-ultimate-guide-on-how-to-start-a-shopify-store-in-2026/
Frequently Asked Questions
Can I change my theme after my store is live?
Yes, absolutely. You can download and customize a brand new theme in the background without affecting your live website. Your products, collections, and blog posts remain perfectly safe. Once the new design is ready, you simply click “Publish” to swap them instantly.
Do I need to know HTML or CSS for Shopify theme customization?
No coding knowledge is required. The visual drag-and-drop editor allows you to change layouts, colors, and fonts entirely through intuitive menus. You only need code if you want a highly specific, custom animation that the theme doesn’t offer natively.
Are free themes actually good enough to make sales?
Yes. Many seven-figure brands still use the free “Dawn” theme. Free themes are incredibly fast, built with clean code, and highly optimized for mobile conversions. You do not need to buy a premium theme to succeed.
How do I add custom fonts to my website?
The platform comes with hundreds of Google Fonts built directly into the typography settings. If you want a completely custom, licensed font, you will need to upload the font files to your website’s asset folder and add a few lines of CSS code.
Why do my product images look blurry?
This happens when you upload an image that is too small, and the theme stretches it to fit the screen. Always upload crisp, high-resolution images (at least 1024×1024 pixels for square product shots) to ensure they look sharp.
Can I customize the checkout page?
You can customize the colors, typography, and logo on the checkout page through your theme settings. However, you cannot alter the fundamental layout or coding of the checkout page unless you are on the extremely expensive enterprise “Plus” plan.
How do I backup my theme before making changes?
Go to your Themes dashboard, click the three dots next to your current active theme, and select “Duplicate.” This creates an exact copy of your website design. If you make a mistake while editing, you can simply restore the duplicated backup.
Will installing a new theme delete my products?
No. Your products, pricing, inventory, customer data, and blog posts are stored in the platform’s core database, not in the theme itself. Changing themes only alters the visual “skin” of the website.
Can I hire someone just to tweak a few things?
Yes. If you mostly like your design but need one specific custom feature, you can hire verified developers through the “Experts Marketplace” to write a small piece of code for you, rather than paying for a full website redesign.
How do I make my website load faster?
Site speed is mostly determined by image sizes and third-party apps. Compress all your images before uploading them. Furthermore, routinely audit your installed apps and delete any plugins that you are not actively using, as they leave leftover script code on your theme.
FAQ Schema Ready Questions
-
Can I change my theme after my store is live?
-
Do I need to know HTML or CSS for Shopify theme customization?
-
Are free themes actually good enough to make sales?
-
How do I add custom fonts to my website?
-
Why do my product images look blurry?
-
Can I customize the checkout page?
-
How do I backup my theme before making changes?
-
Will installing a new theme delete my products?
-
Can I hire someone just to tweak a few things?
-
How do I make my website load faster?
Related Topics Readers Should Learn Next
-
How to Build a High-Converting Homepage from Scratch
-
The Psychology Behind E-commerce Color Palettes
-
How to Write Product Descriptions That Actually Sell
-
Step-by-Step Guide to Setting Up Google Analytics 4
-
How to Optimize Your Navigation Menu for Better Sales
-
The Best Image Compression Apps to Speed Up Your Site
-
How to Use Canva to Design Professional Website Banners
-
Understanding the Basics of Conversion Rate Optimization (CRO)
-
How to Collect and Display Authentic Customer Reviews
-
The Ultimate Guide to E-commerce Typography and Fonts
-
How to Structure Your About Us Page to Build Deep Trust
-
Creating a seamless Mobile Shopping Experience
-
How to Set Up Automated Abandoned Cart Emails
-
The Complete Checklist for Launching a New Online Store
-
How to A/B Test Your Website Layout for More Revenue
Final Verdict
Mastering Shopify theme customization is not about becoming a graphic designer.
It is about understanding how to guide a customer’s eye from the moment they land on your page straight to the checkout button.
A clean, fast, professional-looking website builds instant trust.
Do not overcomplicate the process. You do not need twenty different colors or wild animations.
Stick to a clean layout, use high-quality imagery, and make sure it looks perfect on a smartphone.
Key Takeaways
-
Always use high-resolution, perfectly cropped images to maintain a premium feel.
-
Prioritize mobile view over desktop view, as the vast majority of traffic comes from phones.
-
Keep your color palette simple: one background color, one text color, and one vibrant accent color for your buttons.
Beginner Action Plan
-
Log into your dashboard and install a clean, free theme like “Dawn.”
-
If you don’t have an account, click here to secure your Shopify free trial today.
-
Set your global brand colors, upload a crisp logo, and focus entirely on making your product page easy to read and navigate.
Stop stressing over code. Open the visual editor, trust your instincts, and start building your brand’s digital home right now!